Making Soap Bubbles using Bryce and Photoshop.

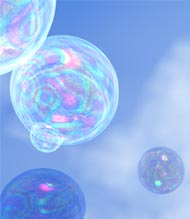
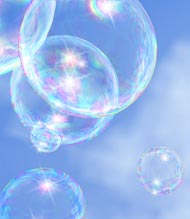
This is a close up crop of the picture, showing you what it should look like when you are finished.

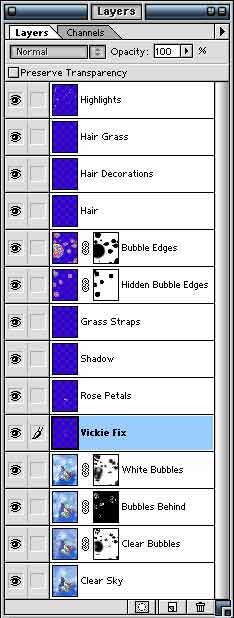
For this tutorial, I assume some working knowledge of both Bryce and Photoshop, or at least a set of manuals handy!

In Bryce, I rendered all the Bubbles (which were just simple spheres, so there really isn't any point in showing you that) several times. I made three materials (which are included in the package of Goodies at the end of this tutorial) and rendered the whole scene with each of them. Then I took away the bubbles in front, and rendered again with each of them. Then I rendered again using Render as Mask with all of them, and only those in back. Finally, I rendered without any of them, to get just the sky.

I brought them all into Photoshop, and arranged them in layers. Those are what I am going to show you here.

First, the layer that is just the sky, since that is the bottom-most layer in Photoshop.

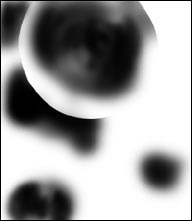
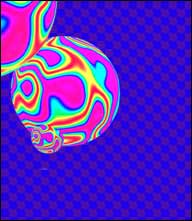
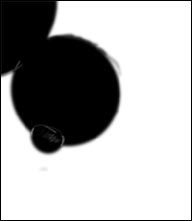
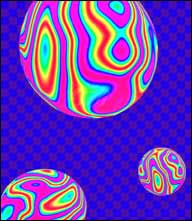
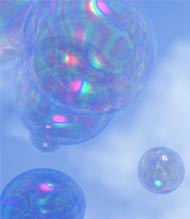
The second layer has the bubbles using the clearest of the materials I made.

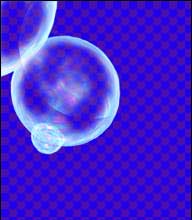
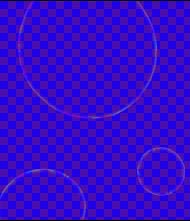
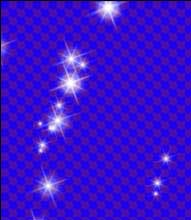
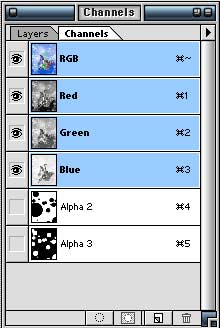
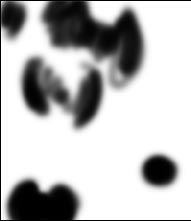
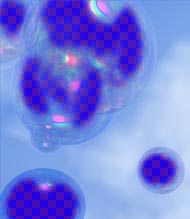
When dealing with transparent objects, the edges are usually less transparent and more reflective than the middle (because you are looking through more of the material.)

You can get this kind of effect in Bryce, but only by using refraction. And as soon as you use refraction, you don't have soap bubbles anymore; you have crystal balls. So using refraction was out. But it's not a problem, you can reproduce the effect manually in Photoshop. Just remember the edges are dense and shiny, the center is clearer.

I brought in this layer by opening both the picture that will be the finished print picture and the render. Then hold down the command/control key and A to select all. Next, tap V to get the Move tool, and hold down the shift key while dragging the render picture onto the print picture. This places the render picture exactly on top of the print picture. Since they were all rendered the same size, it's a perfect fit.

Next, go to the layers palette, and make a mask for the render layer. Once there, mask out the inside of the bubbles by using the Airbrush Tool and drawing on the mask layer with black. (You can tell you are working on the mask layer, because the icon next to the layer shows a gray square with a white circle in the middle of it. If you are working on the paint layer, it shows a paint brush.)

When you have cleared the inside of the bubbles enought to suit you, it's time for the next render.

The reason to do this with a mask and not with the eraser tool is that you can always make the picture come back by using white paint on the mask layer, even if you have saved, and it's a month later! Try that with the eraser! <g>

This shows the render, the mask, and the mask in place on the layer. (I use blue and purple for the checkerboard that shows transparency so that even very light things will show up well on it. If I need dark things to show up, I turn the checkerboard off. You can make it do whatever you want in the Preferences dialog under the Edit menu.)

The next layer is the bubbles that were behind the other bubbles, but using the second material I made for Bryce.

This material is less transparent, and more reflective, than the last one. And more of it gets masked out.

In Bryce, I only rendered the "hidden bubbles" using the rendering marquee, to save time. (When the picture is showing, you can render a small area by dragging your mouse to form a marquee around the area, and using the buttons to the right of the main render button (Resume Render in the middle, and Clear and Render on the far right.))

The steps are exactly the same.

I used the mask from the Render Mask from Bryce to eliminate everything but the "hidden bubbles." This kept me from having problems with layers of overlapping masks and things.

To get the mask into Photoshop, open the Channels palette. Then click in the title for any of the channels in the Mask Render (they are all identical) and drag it onto the print picture. It will appear in the Channels Palette, and all the other channels will be hidden. Click on the RGB channel, and you will see the mask on your colored picture. Click on the eye next to the mask channel, and it will no longer be visible. But it's still there for you to load as a selection. (Don't forget, you can easily invert it whenever you have to by using the command/control I combination.)

This layer, which was treated in exactly the same fashion again, has the front bubbles in it.

I purposely didn't make the edges of the masks perfectly symmetrical. After all, bubbles are constantly moving, and wobbling, and changing their shapes. Having the reflections and transparency uneven gives that illusion in this still picture. I also didn't worry about masking the sky, since it is exactly the same on all the layers.

For the very edges of the bubbles, I used the final Bryce material. It's the same as the other two, really; but this time there is no transparency at all, and the Diffusion and Ambience are turned all the way up.

To get just the very edges of these bubbles showing, I loaded the rendered mask channel as a selection. (Go to the Select menu, and Load Selection. Choose whatever you have named that channel to load it.) I hit the delete key to delete all but the bubbles themselves. Then applied a mask to the layer by clicking on the mask button in the layers palette. Next I held down the option/alt key and clicked on the mask icon in the Layer so that I could see just the mask. Finally I applied a Gaussian Blur filter to the mask. When I clicked back on the picture icon in the layer, only the bright edges of the bubble were showing.

I repeated the whole process with the bubbles that were in front.

Once again, load the mask channel, make a mask, and use Guassain Blur to reduce the layer to just the thin bright lines you see here.

Finally, I added the highlights to the bubbles, using a star brush that I made a long time ago, and white. (The brush is included in the Goodies package.)

When you do this, don't forget to put highlights on both sides of the bubble; the light goes right through, and reflects from both the outer surface and the inner one.

And that's it!

This is what the Layers Palette looked like for this picture. Notice that some of the layers weren't included in the bubbles at all, so I left them out of the tutorial. But I left them in here, in case you wanted to see more than just the bubbles!

I always work in layers like this. I save a copy of the image to use as the print; and that is saved flat and without extra channels to save disk space and speed up printing. But I also keep a copy with all the layers and things, in case something needs to be fixed later on, (or in case I decide to write a tutorial like this one!) I burn it onto 2 CD Roms, and clear it off my disk; but I do save it.

This is the Channels Palette. As you can see, one of the alpha channels has been inverted, and one hasn't. I tend to invert them as needed, flipping them back and forth as I work.

That's it! Happy Bubbles! And don't forget to sign your work, using the copyright symbol (©) and date in your signature.

If you want to download the materials I used in Bryce, and the star brushes I used in Photoshop, you can Download the Goodies.

They are compressed using Aladdins .sit format, since it is smaller than anything else, and the expander is free (Which I, for one, find to be a distinct advantage.) If you need a copy of the expander for Mac, Windows, Dos, or Linux, you can get it from Aladdin here.

If you have a question, write to me and ask it!

Everything on this site is copyright © Robin Wood; all rights reserved. Please do not use anything without permission. To get permission, write to Robin, and explain what you intend to use it for.