Your donations make more tutorials possible. Thanks!
Line work can add a lot to an image; but often, if it's scanned, or brought in from another source, you'll find that it's a flat image on a white background, when what you need is just the lines, on transparency.
Fortunately, it's quite easy to transform any clean line art into exactly that!
Watch the movie to find out one way to do it. (You can download the movie, if you have trouble watching it on line.)
Briefly, all you need to do is Copy the background layer (it's always a good idea to leave original layers intact.) You can do that by tapping Command J on a Mac, ctrl J on a PC.
Next, Select All (Command/ctrl A) and Copy (Command/ctrl C) so you have the image on your clipboard.
Make a new Layer Mask, hold down the Option/alt key, and click the Mask Thumbnail to view the Mask.
Paste the image into the mask, and Invert it (Command/ctrl I) so that it's white on black, and will work properly.
Check to make sure that neither the White nor Black are actually gray, using the Info panel.
If they are, use Levels (Command/ctrl L) to correct them.
Click on the Image Thumbnail, to select the Image, not the Mask.
Fill the Layer with black, to eliminate the white halo that will be there from any anti-aliasing in the original work.
Apply the Layer Mask, and you're done!
There is additional information in the Accordion below, if you'd like details and screen shots.
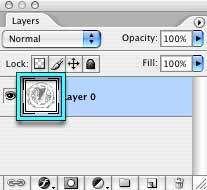
There are many ways to do most things in Photoshop. If you know you don't need to keep the original intact (you already have a backup copy) you can just hold down the Option key (alt on a PC) and double click on the Background to put it on its own layer. It will automatically be called Layer 0 when you do.
You won't be able to remove the background, and see transparency, while it's still a Background layer, with the name in Italics. This is because that particular layer is flattened; it's not a floating layer at all, and it can not have transparent pixels.
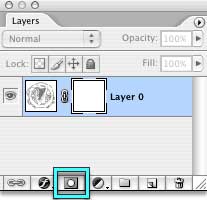
Click this icon, at the bottom of the Layers palette, to add a new Layer Mask to the image. It will show up to the right of the layer. Black pixels on the Layer mask will hide the associated pixels on the Layer itself (hidden pixels will look transparent.) White pixels will show the Layer pixels, and gray pixels will be partially shown (they will appear partially transparent.)
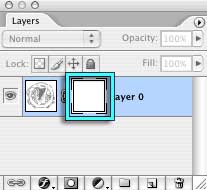
There will be times when you want to actually see what is on the Layer Mask, not what is on the layer. To do so, simply hold down the Option key (alt on the PC) and click right on the Layer Mask Thumbnail. The normal view, which shows all the non-hidden layers in your document, will be replaced with a view that only shows the Mask.
You can also see the Mask as a colored overlay on the layer, if you'd like. To do that, hold Shift and Option (Shift alt on a PC.) You'll see a red overlay, on the normal Layer view. This can be very helpful, when you are trying to mask fine details. Just make sure you are painting on the Mask, not on the Layer! (The one you are painting on will have an outline around it, in recent versions of Photoshop.)
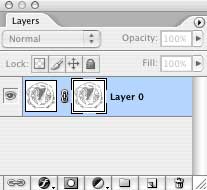
In order to Paste anything into the mask, you will need to be viewing the Mask itself, as explained above. Otherwise, any attempt to paste, even if you have the Mask selected, will result in pasting into a new layer above the selected layers.
Once you are looking at the Mask, though, anything you paste will show up on the Mask. (So will anything you draw, or any filters you run or adjustments you make; but those would anyway, if the Mask was selected.)
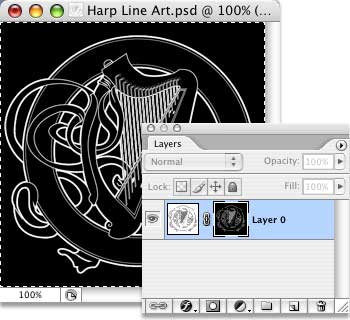
Since pixels that are white on the mask show the corresponding pixels on the Layer, and pixels that are black hide those pixels, the image (which will be black lines on a white ground when you paste it in) needs to have white lines on a black ground.
To do that, simply Invert it, either by going to Image > Adjustments > Invert, or by holding down the Command key and tapping I (ctrl I on a PC). Once that is done, the mask will work properly to show the lines, and hide the background!
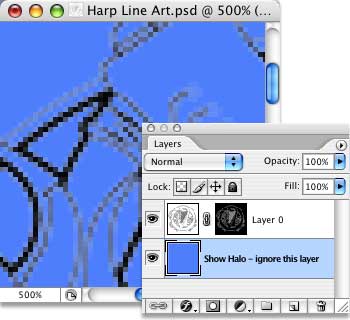
The Mask is prefect; but the Layer isn't! Anywhere there were anti-aliased pixels, or fine lines, you'll find that those pixels are partially transparent (because of the mask) which will preserve the anti-aliasing. But they are also partially white, from the original artwork. Which, of course, makes them gray. I've put a blue layer below the image here, so you can see that, just as I put a black one in the movie. You don't need to make either of those layers, of course. They're just there to illustrate the problem.
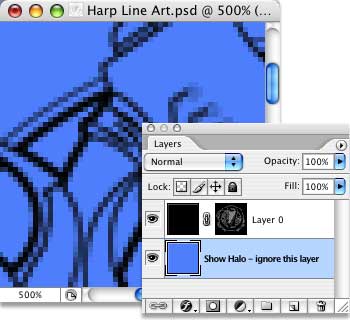
Since the white and gray pixels on the Layer are causing the problem, let's get rid of them! Click on the Layer to select it (it will have an outline when it's selected, like the blue layer in this image) and fill it with a solid color. In this case, we're using Black.
You can do that in several ways. Hold down the Option key, and tap Delete (alt and backspace on a PC) to fill with your Foreground Color. Hold down Command, and tap Delete (ctrl backspace on a PC) to fill with your Background Color. Or go to Edit > Fill (or tap Shift F5) to get the Fill dialog that will allow you a fairly wide choice of colors (or patterns) to use as the Fill.
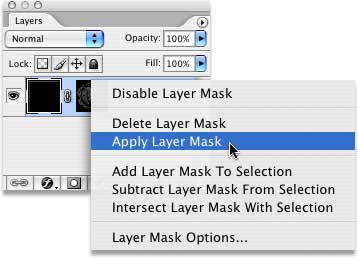
The last step is to Apply the Layer Mask. To do this, click with the Right Mouse Button on the Layer Mask thumbnail. You'll get a contextual menu that has things you can do with the Layer Mask, including Apply it.
Do that, and you're finished! Name the layer, and copy it to any document you like, or use it in any way you can imagine. You can now use all kinds of blending modes, use it as a Clipping Layer, or do all the other things you couldn't do while it was still attached to the white background. Enjoy!
Note: if you would like to see the information in the Accordion when printing the page, disable Javascript in your Browser, and reload the page. You should see all the Accordion panels open before you print.